| Informational Websites | ChronoMaddox -- the legacy of Chuck Maddox | OnTheDash -- vintage Heuer website | Zowie -- Omega information |
| Discussion Forums | ChronoMaddox Forum | Heuer Forum | Omega Forum |
| Counterfeit Watchers | ChronoTools Forum | ChronoTrader Forum |
|
|
The largest independent, non-commercial, consumer-oriented resource on the Internet for owners, collectors and enthusiasts of fine wristwatches. Online since 1998. | |||||||
|
||||||||
|
||||||||
Vintage Heuer Discussion Forum
The place for discussing 1930-1985 Heuer wristwatches, chronographs and dash-mounted timepieces. Online since May 2003. | |||||||
| |||||||
| |||||||
: Before I even begin I would like to apologise for the end result
: (don’t look now). I’m sure many who read this want the
: basics. Maybe a nice head on shot without bright spots, deep
: shadows and pin sharp throughout. Sorry to disappoint. For Part
: 1 I have gone a little overboard and aimed quite high. In doing
: so I hope that I can inspire your creativity and at the same
: time, give you some tips that can help you improve or perfect
: your efforts at watch photography.
: I have been practising photography since the age of 13 when I got
: my first camera and set up a darkroom. Being able to fully
: understand and control the entire process is the essential
: ingredients in any creative medium in order to start expressing
: yourself as an artist. Over the past 30 something years I have
: improved my technical skills and more recently fully embraced
: the digital process. The artistic side is subjective and I
: consider myself to be a reasonable amateur. Collecting watches
: and photography go hand in hand especially since we share our
: watch passion mainly by exchanging words and photographs via the
: internet and email. Collecting watches is an enjoyable pastime
: and so too is photography. Combining these two interests doubles
: the fun.
: When I started photographing watches I struggled to get the images
: I wanted. I was using natural light and would set up near a
: window on a bright day with lots of white reflective material
: around the subject. Its not easy and I never achieved a standard
: that I was happy with. I was also relying on the sunshine and
: living in the UK that’s not a good idea. So I decided to set
: up a simple studio with artificial lighting which meant that I
: could take pictures whenever I felt like it including at night.
: This is my shed at the end of the garden:
:
: 
: In the corner of the shed I have a cupboard space 1 meter wide with
: a work surface at 900mm high. Just outside and to the right is a
: wall mounted magazine rack that holds all manner of white, black
: and coloured card and paper. More on that later.
:
: 
: I have 4 no. 600 x 600mm surface mounted fluorescent light fittings
: with daylight bulbs positioned on the ceiling, one on each side
: of the work surface and one (not shown) which sits on the work
: surface acting as a light box. I rarely use all 4 at the same
: time, I hardly ever use the ceiling mounted fitting and more
: often than not I just use 1 light to the right (or left) of the
: subject.
:
: 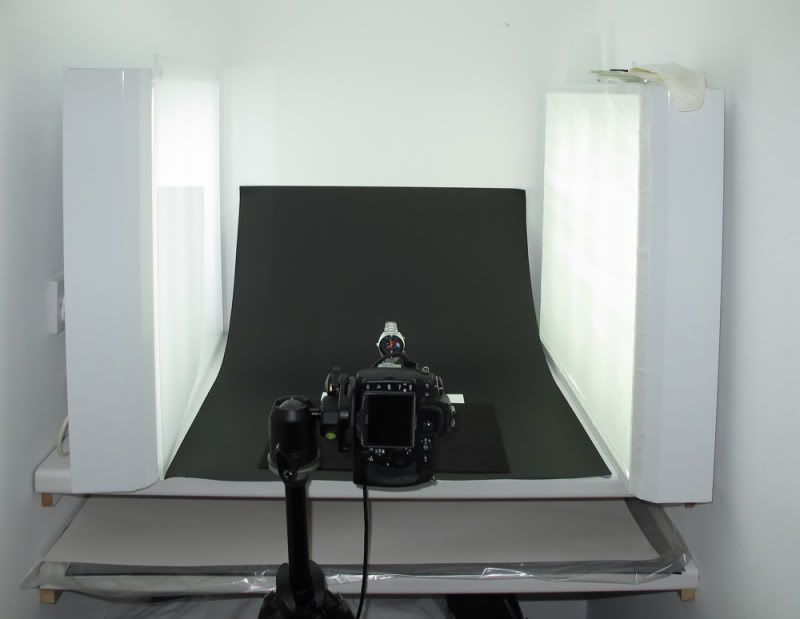
: For the background I use either black or white card that slopes
: from the base up to the wall creating a nice and even curve.
: There is always lots of blue-tack (also known as white-tack,
: press stick etc) lying around. I use it to fix the card to the
: wall and hold the front edge to the work surface.
: The lights are standard commercial fittings but not the flush
: mounted type that sit in a ceiling grid system. These are
: designed to be fixed flush to the underside of a ceiling and
: therefore have a finished edge which means that they sit nicely
: on the work surface and can be moved if necessary. I use tracing
: paper and opaque acrylic to cover the bulbs. This is essential;
: it acts as a diffuser to achieve a soft and even light.
: As you can see the camera (Nikon D300) is mounted on a tripod with
: a cable release. Most of my shots are taken with a 50mm macro
: lens. I do have a 105mm macro lens as well as some extension
: tubes for close up work. I always shoot in RAW file format and
: post process the images using Photoshop CS3. I will go into more
: detail on equipment and Photoshop later in the series.
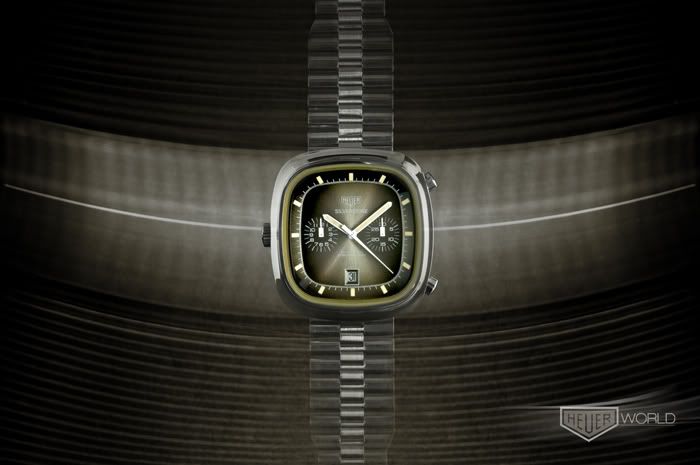
: Now to the specifics of the image in question (don’t look down!).
: I had the idea for this shot in my mind for quite some time. In
: other words I pre-visualised the final result long before I
: actually took it. The subject I chose was a recently received
: Fume Silverstone, possibly one of the most photogenic vintage
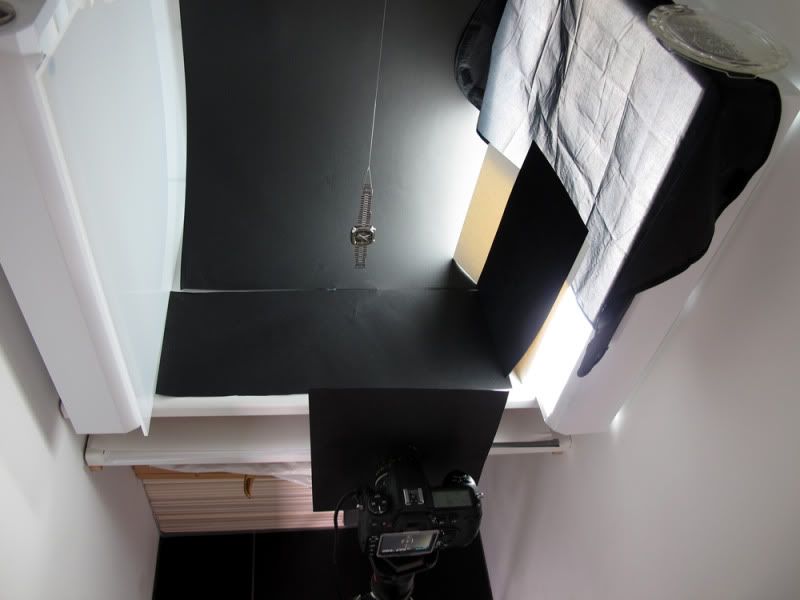
: Heuer watches around. I started by suspending the watch on
: fishing line from a pole that was supported by the two light
: fittings on either side. I used more fishing line and of course
: blue-tack to stabilise the base so that the front of the watch
: was parallel to the back of the camera and perfectly still.
:
: 
:
: 
: I closed up the white space on the base with a piece of black card
: to reduce the amount of reflective light coming from below. I
: used one light (right of subject) with a selection of
: diffusers/reducers including transparent black fabric, solid
: black card and white paper. The light fitting to the left of
: subject was off but acted as a reflector illuminating the left
: side of the subject. I set up the camera with a piece of black
: card with a cut out that fits over the lens. This and the other
: haphazard arrangement of card and paper is designed to reduce
: glare on the crystal and at the same time illuminate the
: subject. This arrangement is by trial and error. I will do test
: shots, view the result on the camera screen in high
: magnification always looking for unsightly reflections, bright
: spots and dark areas and change the position of the cards to
: improve the result. I also check exposure this way as I always
: set the camera to manual and pre select an aperture. In this
: case I used f/16 which gives a good amount of focus through the
: subject from front to back (known as depth of field) and vary
: the shutter speed to find the correct exposure which in this
: case was 1 second.
:
: 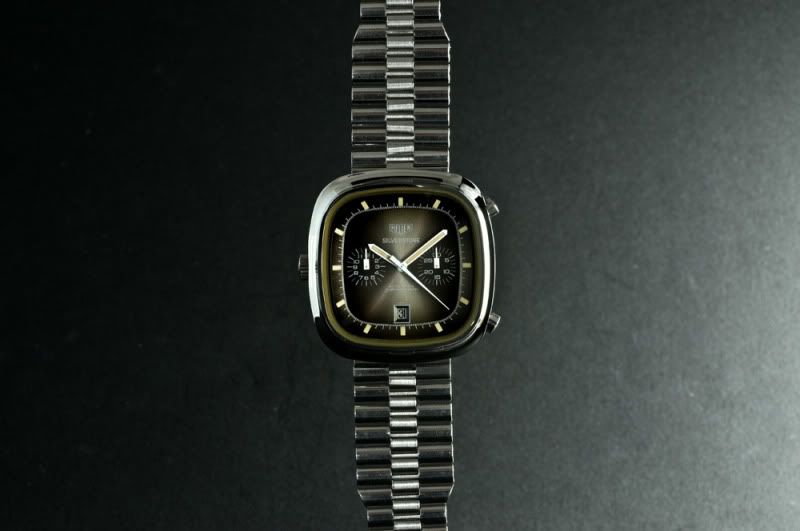
: It is worth noting at this stage that I always clean the watch case
: and crystal before setting the watch in place and in most cases
: I take the final image when the hands are at 8 or 9 minutes past
: 10 and the chrono hand is stopped around the 23 second mark. I
: don’t worry about the date or sub register hands. This is a
: timing issue. Miss the shot and it usually involves resetting
: the time. Often the complex arrangement of cards and paper comes
: crashing down and in this case, the watch starts moving around
: on the suspension system. Then of course you have the
: fingerprint on the case which will need cleaning again. I am
: sure you would agree at this point that it is a finicky business
: and definitely a labour of love so you will be forgiven if you
: skip to the end and go back to your tried and tested technique.
: As I said above, I pre visualised this shot and what I saw in my
: minds eye was a stationary picture of a watch with some motion
: blur in the background. Having achieved part 1 of the image I
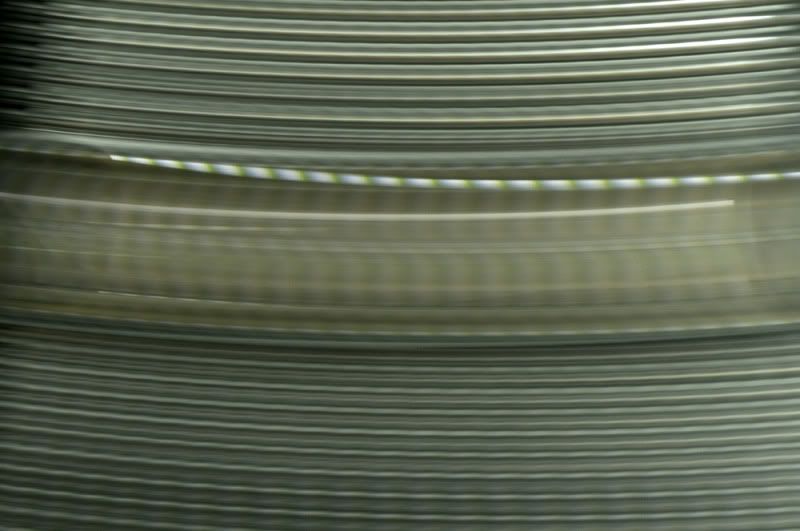
: then removed the lower stabilising lines without altering the
: camera position in any way. I changed the shutter speed to ¼ of
: a second and started the watch in a pendulum motion swinging
: from side to side. I did a number of shots which were all
: different because of the timing of the shutter release and
: because the watch was also spinning creating different
: reflections of light. I also achieved different patterns and
: degrees of motion blur.
:
: 
:
: 
: The studio session now over it was time to view the images on the
: computer. With all the test shots and motion shots I had a total
: of 48 images – its digital and cost nothing so why settle for
: one or two when you have gone to all this trouble. I use
: Photoshop Bridge to view all the images and to make my final
: selections. I open the RAW images using the Photoshop RAW
: converter. This gives you all sorts of options to change the
: image including temperature, tint, clarity etc etc etc. The list
: of options is almost endless. I prefer to do most of my image
: processing in Photoshop and not in the RAW converter. Processing
: the image is an intuitive exercise combining software knowledge
: and the ability to know what you want to achieve before you even
: begin. This bit is hard to explain and even harder to teach.
: Lets just say that for the first image, I composed and cropped
: as necessary, set the contrast using levels and sharpened the
: image. These are the three steps I do on almost every image. In
: addition, I also darkened the background of this shot.
: I selected and opened the second image as before and using the same
: RAW converter setting as I used in image 1 so that they matched
: in tone and colour temperature. I’m sure I did a fair bit to
: the image in particular darkening the right side to get an even
: illumination from left to right. This image will become the new
: background and complete the process.
: Now the clever bit made so much easier by Photoshop and the digital
: process. Combining Image 1 and 2 is simply a matter of moving
: one image into the other. The next trick is using layers in
: Photoshop. Once again hard to explain but there are many books
: covering this subject and when you know how it is the most
: amazing Photoshop tool amongst many amazing Photoshop tools. Add
: a bit of blending some jiggery pokery and we now have the end
: result.
:
: 
: Congratulations if you got this far. I hope you enjoyed the
: tutorial and that it inspires you to be creative with your watch
: pictures, take better pictures in general and maybe even
: learning Photoshop if you have not already done so. Look out for
: Part 2.
: Regards
: Paul
: www.heuerworld.com
| Chronocentric and zOwie site design and contents (c) Copyright 1998-2005, Derek Ziglar; Copyright 2005-2008, Jeffrey M. Stein. All rights reserved. Use of this web site constitutes acceptance of the terms of use. | CONTACT | TERMS OF USE | TRANSLATE |